

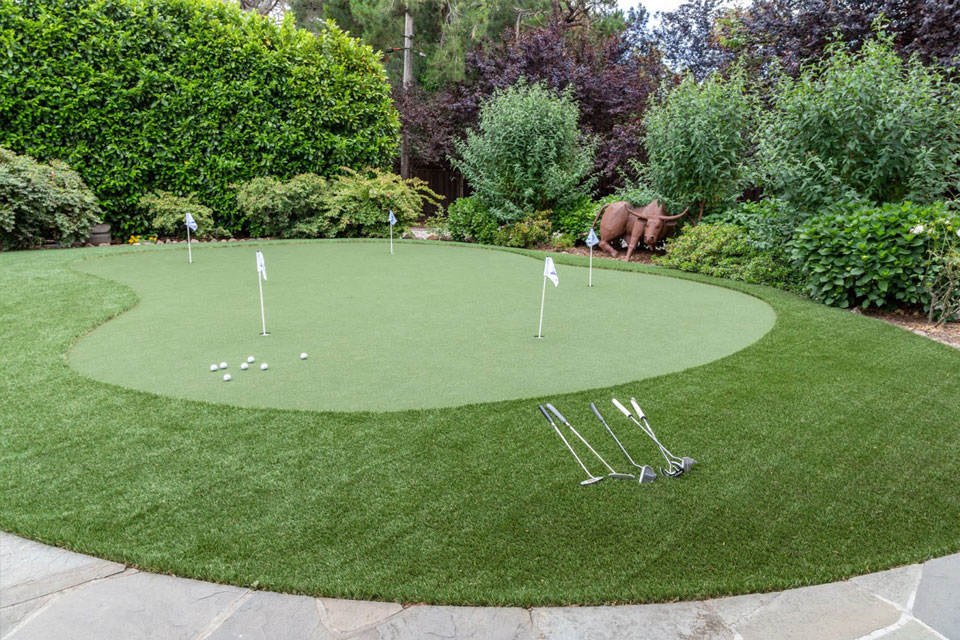
Have you ever dreamed of having your own personal backyard putting green? That dream can be turned into a reality! Whether you’re a seasoned golfer looking to perfect your short game or a beginner wanting to practice and have some fun, a backyard putting green offers endless opportunities for enjoyment and improvement.
Backyard putting greens have been gaining immense popularity in recent years, and it’s not hard to see why. With the convenience of having a golfing haven just steps away from your home, more and more homeowners are opting for this fantastic addition to their outdoor spaces.
It’s not just avid golfers embracing this trend; families, friends, and even corporate settings are discovering the joy and benefits of having a backyard private putting green.
By the end of this blog, you’ll be equipped with the knowledge and inspiration to create your own backyard-putting green paradise. So, get ready to tee off on an exciting journey toward the perfect golfing haven right at your doorstep!
Planning and Design Phase
The first step in creating a putting green in your backyard is to assess the available space. Take a good look at your yard and identify an area that can accommodate the size of the green you envision.
Consider the shape and dimensions of the space, ensuring it provides enough room for a satisfying golfing experience. Keep in mind that even smaller yards can be transformed into impressive putting greens with the right design and layout.
Next, it’s time to choose the type of putting green that best suits your needs and preferences. There are two main options: natural grass or synthetic turf.
- Natural grass provides an authentic golf course feel but requires regular maintenance and may be more sensitive to weather conditions.
- Synthetic turf, on the other hand, offers a low-maintenance solution that can withstand heavy foot traffic and various weather conditions while providing consistent playability.
Selecting the right materials and turf options is crucial to achieving a high-quality and durable backyard putting green. For natural grass greens, choose a variety specifically suited for putting greens, such as bentgrass or Bermuda grass.
If you opt for synthetic turf, consider factors such as pile height, density, and color to achieve a realistic look and optimal playability. Research different turf options and consult with professionals to find the best fit for your specific requirements.
The slope and contour of your land play a significant role in the design and functionality of your backyard putting green. Ideally, a flat surface is desirable for a consistent and enjoyable playing experience.
However, if your yard has a slope, don’t worry! You can work with the existing topography by incorporating gentle slopes or terracing to create a challenging and dynamic putting green. It’s all about making the most of the natural features of your land.
Now it’s time to determine the size and shape of your private putting green. Consider how much space you have available and how you envision using the green. Do you want a compact, focused green for practicing specific shots, or would you prefer a larger, more expansive green for a more comprehensive golfing experience?
The size and shape of your green will also depend on your skill level, budget, and personal preferences. Be creative and design a green that fits your needs perfectly.
Preparing the Site
Before you can start the putting green installation process, it’s essential to clear the designated area and remove any obstacles that might interfere with the putting green in your backyard.
This includes rocks, tree roots, and any other debris that could affect the smoothness and playability of the green. A clear and obstacle-free surface will ensure a more enjoyable and professional golfing experience right in your backyard.
Proper drainage is a crucial aspect of your backyard putting green’s longevity and performance. You don’t want to end up with a waterlogged green after a rainstorm!
Assess the natural drainage patterns in your yard and make sure there is sufficient slope to allow water to flow away from the green. You may need to incorporate additional drainage solutions, such as French drains or catch basins, to keep your putting green dry and playable.
For a smooth and consistent putting surface, it’s important to level the ground and address any slope issues. Use a laser level or a string line to ensure the ground is even and free of any noticeable undulations.
If your yard has significant slopes, you can use grading techniques or build up certain areas to create a more level playing surface. Remember, the goal is to create a challenging yet fair green that allows you to practice your putting skills effectively.
Maintaining the lush green appearance of your backyard putting green requires proper watering. Installing an irrigation system can help you maintain the ideal moisture levels without the hassle of manual watering.
Consider whether you want to incorporate an irrigation system during the installation process. Consult with professionals to determine the most suitable system for your specific needs. An automated irrigation system can keep your green looking fresh and inviting all year round.
To ensure the longevity and stability of your backyard putting green, proper base preparation and compaction are crucial. The base provides a solid foundation for the turf and helps with drainage.
It typically consists of crushed rock or decomposed granite, which is spread and leveled evenly across the area. The base is then compacted using a plate compactor to ensure stability and prevent any future settling. Take your time during this step, as a well-prepared base is the key to a smooth and long-lasting private putting green.
Putting Green Installation Process
1. Laying down the turf or artificial grass
Now comes the exciting part: laying down the turf or artificial grass for your backyard putting green! Start by unrolling the turf carefully, ensuring it covers the designated area. Smooth out any wrinkles or creases, and adjust the positioning as needed to ensure a seamless and natural look. Take your time to ensure the turf is evenly spread and free of any imperfections.
2. Securing the edges and seams
To ensure the longevity and stability of your putting green, securing the edges and seams is essential. Use landscape spikes or adhesive to secure the edges of the turf, preventing any shifting or movement. Pay special attention to the seams, ensuring they are tightly joined together for a seamless appearance.
3. Installing cups and flags
No putting green is complete without cups and flags! Install the cups in strategic locations throughout the green, creating challenging holes to test your skills. Make sure the cups are level and flush with the turf surface for an authentic playing experience. Insert the flags into the cups, adding a touch of color and visual appeal to your backyard oasis.
4. Incorporating fringe and rough areas
To enhance the overall aesthetic and functionality of your backyard putting green, consider incorporating fringe and rough areas around the green. Fringe refers to the short turf surrounding the green, while rough areas mimic the longer grass found on a traditional golf course.
These elements add depth and complexity to your putting green, allowing you to practice various shots and improve your game. Have fun designing these areas to match your personal preferences and create a visually stunning landscape.
5. Adding sand or infill for better performance
For optimal performance and playability, consider adding sand or infill to your putting green. This helps to stabilize the turf fibers, provide support, and create a more authentic ball roll. Infill options can include sand, rubber granules, or a mix of both. Consult with professionals or the manufacturer’s recommendations to determine the most suitable type and amount of infill for your specific turf.
Maintenance and Upkeep
Regular cleaning and grooming are essential to keep the putting green in your backyard in pristine condition. Remove any debris, such as leaves or twigs, that may accumulate on the surface. Use a leaf blower or a gentle rake to maintain a clean and tidy green.
Additionally, brush the turf regularly to prevent matting and ensure an even ball roll. By staying on top of cleaning and grooming, you’ll enjoy a consistently smooth and enjoyable putting experience.
Proper watering is key to maintaining the lush appearance and optimal playability of your backyard putting green. If you have an irrigation system, ensure it is programmed correctly to provide adequate moisture without overwatering.
For natural grass greens, water deeply and infrequently to encourage deep root growth. Avoid watering during the hottest parts of the day to minimize evaporation. Strike the right balance to keep your green looking fresh and vibrant without wasting water.
To maintain a well-manicured and professional look, regular trimming and edging of the turf are necessary. Use a sharp utility knife or specialized turf trimmer to trim any excess or uneven edges. This ensures a neat and seamless appearance, enhancing the overall aesthetics of your putting green.
Don’t forget to edge along the fringe and rough areas as well. With clean and crisp edges, your backyard putting green will be the envy of the neighborhood.
Just like a traditional lawn, your backyard putting green may encounter pests and weeds. Stay vigilant and address these issues promptly to prevent any damage to the turf. Treat weeds with appropriate herbicides, following the instructions carefully.
If pests like grubs or insects become a problem, consider using environmentally friendly solutions or seek professional assistance. Regularly inspect your green for any signs of infestation or weed growth to ensure a healthy and pest-free playing surface.
Preventative measures and repairs play a crucial role in maintaining the longevity of your backyard putting green. Keep an eye out for signs of wear, such as thinning turf or damaged areas. Address these issues promptly by patching or replacing damaged sections.
Consider using preventative measures, such as placing walk-off mats near the entrance to minimize wear in high-traffic areas. Regularly inspect the cups and flags for any damage and replace them as needed. By staying proactive, you’ll keep your backyard putting green in top shape for years to come.
Enhancements and Accessories
Extend the hours of enjoyment in your backyard putting green by adding lighting for nighttime use. Install LED lights strategically around the green to create a magical ambiance and ensure visibility.
Not only does lighting enhance the aesthetics of your backyard, but it also allows you to practice your putting skills even after the sun goes down. Imagine the excitement of sinking a putt under the stars!
Enhance the overall beauty and charm of your backyard putting green by incorporating landscaping elements around the green. Plant vibrant flowers, shrubs, or ornamental grasses to create a visually appealing backdrop. Consider adding rocks or decorative stones to add texture and depth.
Landscaping elements make your putting green visually stunning and create a sense of tranquility and serenity as you tee off.
Take your golfing skills to the next level by installing practice aids and training tools around your backyard putting green. From putting mirrors and alignment sticks to chipping nets and target flags, there are various accessories available to help improve your technique. These tools provide feedback and guidance, allowing you to focus on specific aspects of your game and fine-tune your skills.
Make your backyard putting green a comfortable and inviting space by considering seating and shade options. Install benches or outdoor seating where you can relax and take in the beauty of your green. Consider adding umbrellas or a pergola to provide shade on hot sunny days. These additions create a cozy and functional environment for you and your guests to enjoy while taking breaks between putts.
Last but not least, don’t forget to customize your backyard putting green to fit your personal preferences. Add personal touches that reflect your style and interests. Hang flags or banners representing your favorite golf courses or players. Incorporate decorative elements such as golf-themed signs or artwork.
The possibilities are endless! Let your creativity shine as you transform your putting green into a unique and personalized oasis.

With LaytonScape, Your Golfing Paradise Awaits!
LaytonScape’s team of professionals is dedicated to bringing your vision to life, ensuring that your backyard putting green exceeds your expectations. From the initial planning and design phase to the final touches and enhancements, LaytonScape has the knowledge and experience to make your dream a reality.
Whether you’re a seasoned golfer looking to refine your skills or a golf enthusiast seeking a fun and unique addition to your outdoor space, LaytonScape has got you covered. Explore our services, view our portfolio, and get in touch with our friendly team.
It’s time to tee up and experience the thrill of having your very own backyard putting green!