

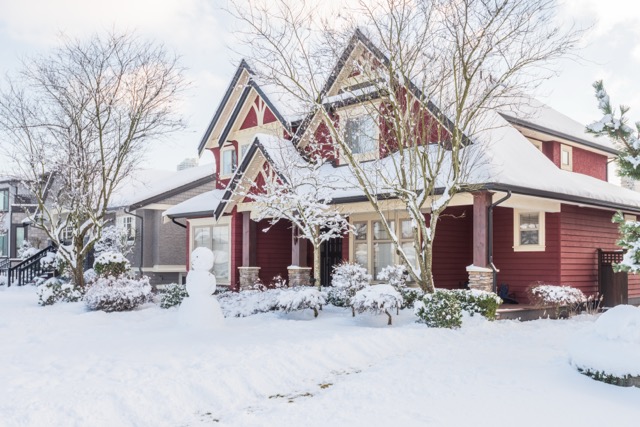
As winter approaches, it’s time for homeowners to start preparing their landscaping for the cold, snowy months ahead. One of the most important tasks is making sure you properly winterize sprinklers before freezing temperatures arrive.
When water remains inside your irrigation lines, valves, or fittings, it freezes and expands, which cracks components or causes complete system failures. These repairs cost homeowners significantly, and many people don’t notice the damage until spring.
The good news is that winterizing your sprinkler system isn’t complicated. With a clear plan and a few simple tools, you can protect your lawn, garden beds, and irrigation equipment from winter weather. These steps will also help you winterize your yard, ensuring that your landscape is ready to thrive again when warmer weather returns.
Below are the essential steps to help you get your system ready for freezing temperatures.
Step 1: Turn off the water supply
Every winterization process begins by turning off the water supply to your irrigation system. Most homes have a dedicated shutoff valve located in the basement, crawl space, garage, or an outdoor valve box. Turn it to the “off” position to stop water from entering the sprinkler system.
Once the valve is off, double-check for any auxiliary valves or drip-line shutoffs. Some systems also include vacuum breakers that you must turn off before continuing. This simple step keeps new water from seeping into the system while you work to winterize sprinklers completely.
Step 2: Drain the irrigation lines
Draining your irrigation lines is one of the most important parts of the winterization process. There are three primary methods:
Manual drain
Systems with manual valves allow you to release water from key low points. Open each valve one at a time until the water stops flowing.
Automatic drain
Some systems include built-in valves that open automatically when water pressure drops. Even so, it’s still wise to check for trapped water in higher sections of the system.
Blowout drain
A blowout is the most thorough option. This method uses compressed air to push all remaining water from the lines. Because it requires the right equipment and technique, many homeowners hire a professional to avoid accidental damage.
Draining the lines thoroughly protects your irrigation system through the coldest months of the year.
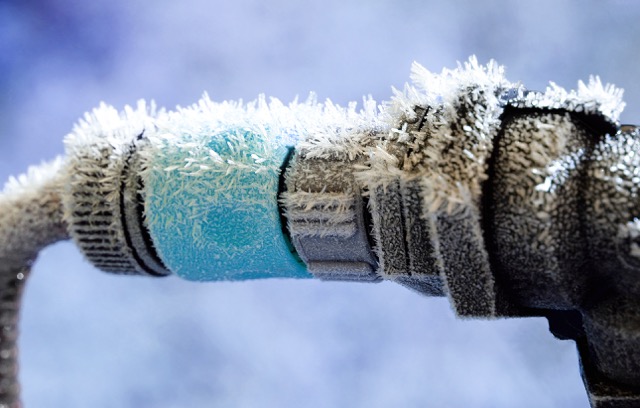
Step 3: Insulate exposed components
Any part of your above-ground irrigation system is especially vulnerable to freezing temperatures. Wrap exposed pipes, valves, and backflow preventers with insulation tape or foam covers. Some homeowners also use purpose-built backflow bags for added protection.
Insulating these components is a simple part of the process to winterize your yard, helping to protect your entire landscape from winter damage.
Step 4: Shut down the controller
Your sprinkler controller, whether digital or analog, should be turned off for the winter. Most controllers have an “off” or “rain mode” that preserves your programming while preventing the system from running.
If you use a smart controller, check whether it has automatic freeze protection. Many modern systems automatically skip watering cycles when temperatures drop, making it easier to winterize sprinklers accurately and safely.
Step 5: Check and clean sprinkler heads
Before you pack away your irrigation supplies for winter, take a moment to inspect your sprinkler heads. Dirt, grass clippings, and other debris can clog nozzles, affecting water flow and reducing efficiency. Clean off each head and make sure it retracts properly.
A clean and fully functional sprinkler head is less likely to crack or warp in freezing temperatures, which will help your sprinkler system run smoothly in the spring.
Step 6: Protect backflow preventers
Backflow preventers keep contaminated water from flowing back into your home’s drinking supply, and their design and location make them one of the most freeze-prone parts of your irrigation system. To protect this component, start by draining the backflow completely so no water remains inside to freeze or expand.
After draining it, wrap the unit in weatherproof insulation and, if possible, place a hard-shell backflow enclosure over it for added protection. Properly insulating your backflow preventer helps winterize your yard and maintain a safe, reliable irrigation system.
Step 7: Inspect your yard’s grading and water flow
As you prepare to winterize your yard, take the opportunity to look for drainage issues. If your yard slopes toward your home, or if you notice areas where water tends to pool, freezing temperatures can exacerbate those issues. You may see ice buildup, soil erosion, or flooding during early spring snowmelt.
Addressing grading issues now helps protect your landscaping structures and reduces the chance of water pooling inside your pipes.
Step 8: Schedule a professional winterization service
While some homeowners are comfortable performing their own winterization, many prefer to hire a professional landscape team. Professionals use commercial-grade air compressors to blow out lines safely and thoroughly. They also inspect for leaks, failing valves, and worn components that could affect system performance in the spring.
If you’re unsure whether you completed the process correctly or simply want peace of mind, scheduling a professional to winterize sprinklers is a smart choice.
Common mistakes to avoid
Homeowners often unintentionally cause damage by skipping steps or rushing through the winterization process. Many people leave water in their irrigation lines, forget to drain the backflow preventer, or use a small air compressor at too high a pressure during a blowout.
Others allow the system to keep running late into the season or fail to protect exposed components before the first freeze. Each of these oversights increases the risk of cracked pipes, damaged valves, or costly spring repairs. Taking the time to avoid these pitfalls helps ensure your sprinkler system stays protected throughout the winter months.
Signs your system wasn’t winterized properly
If you don’t adequately prepare your system for cold weather, you may notice several problems when you turn it on in the spring. Leaking pipes or unexpected puddles in the lawn often point to hidden cracks caused by expanding ice. Sprinkler heads may sputter or fail to rise, and some zones may show uneven water pressure.
These issues typically indicate that freezing temperatures have damaged parts of the irrigation system, and you may need professional repairs to restore full functionality.
Start preparing your yard for winter now
Winterizing your sprinklers is one of the most important ways to protect your landscape from Utah’s freezing temperatures. When you take the time to winterize sprinklers, safeguard your sprinkler system, and begin the process to winterize your yard, you preserve your investment while ensuring your property is ready for spring.
If you want expert help with winterization, inspections, or seasonal landscape preparation, contact the team at LaytonScape. Our professionals ensure your system is winter-ready and functioning at its best when the snow melts and the growing season begins again.